TEXTURING WITH SALT
Salt technique - what is it, and how does it work?
When salt is added to a wet wash of paint, the salt will absorb the pigment and pull it across the paper creating unique, abstract patterns. (often described as starbursts, mottles, or sparkles)
Once the salt is added, it is best to leave your work undisturbed until the pigment has completely dried. There will most likely still be some remaining bits of salt that have dried onto the paper, but they should brush off easily.
This salt technique is often used to create the impression of foliage, snow, stars, or even fur. For an example, I used salt in the background of this "Snowy Owl" painting to create the illusion of snowflakes. This effect, combined with the cool blue tones, helped me achieve a chilly atmosphere.
Truly, the options for the salt technique in your watercolor work is as endless as your imagination!
Will different salt create different textures?
Absolutely! The different physical properties of the various types of salt crystals will each produce slightly different but relatively unique effects. As a general rule, the coarser the salt used, the bigger your pattern will be.
There are no right or wrong salts to use when expressing texture in watercolor. The preference is entirely up to your own personal style and leanings. So have fun experimenting with different salt types available to you!
Below, I've illustrated some of the most well known and easily obtained salts for texture reference:


Salt distribution - When to apply salt to a wet wash?
When applying salt to a wet wash of pigment, timing will determine the success. If salt crystals are applied while the watercolor pigment is too wet, the salt will dissolve without creating a starburst texture. If the pigment is too dry, then the salt will stick to your paper. To achieve the best results, the surface should be damp and have a slight sheen to the paper.


How will the pigment to water ratio affect the salt texture results?
Salt reacts more to water than it does to pigment. So the more pigment you collect on the brush, the less water it has so the salt texture will produce smaller starbursts. In the image on the right, I used the same color using more/less pigment/water ratio so you can see the differing effects you will get depending.
How do I soften the effect of the salt pattern?
Salt will generally create a bold pattern once it has fully dried on the paper. This striking texture can be desirable in some instances and distracting in others. To soften the effect, carefully use a paintbrush to glaze over the salt texture with either clean water or pigment.


Will salt create texture with any pigment?
Technically, it is possible to create texture with salt using any pigment, but the results will be more clear with a non-granulating pigment. Granulating colors will not produce an obvious starburst effect since it is already heavily textured.
How does humidity affect the salt technique?
Salt is hygroscopic, which means it absorbs water vapor from the air, so humidity in the studio needs to be taken into consideration. Over time, salt will absorb moisture from the air. If the salt being used has collected too much moisture, the results of this texturing technique will not be strong.
Fortunately, this is an easy fix. Simply pre-dry the salt in an oven (Bake for 1 hour at 150 degrees) before using.

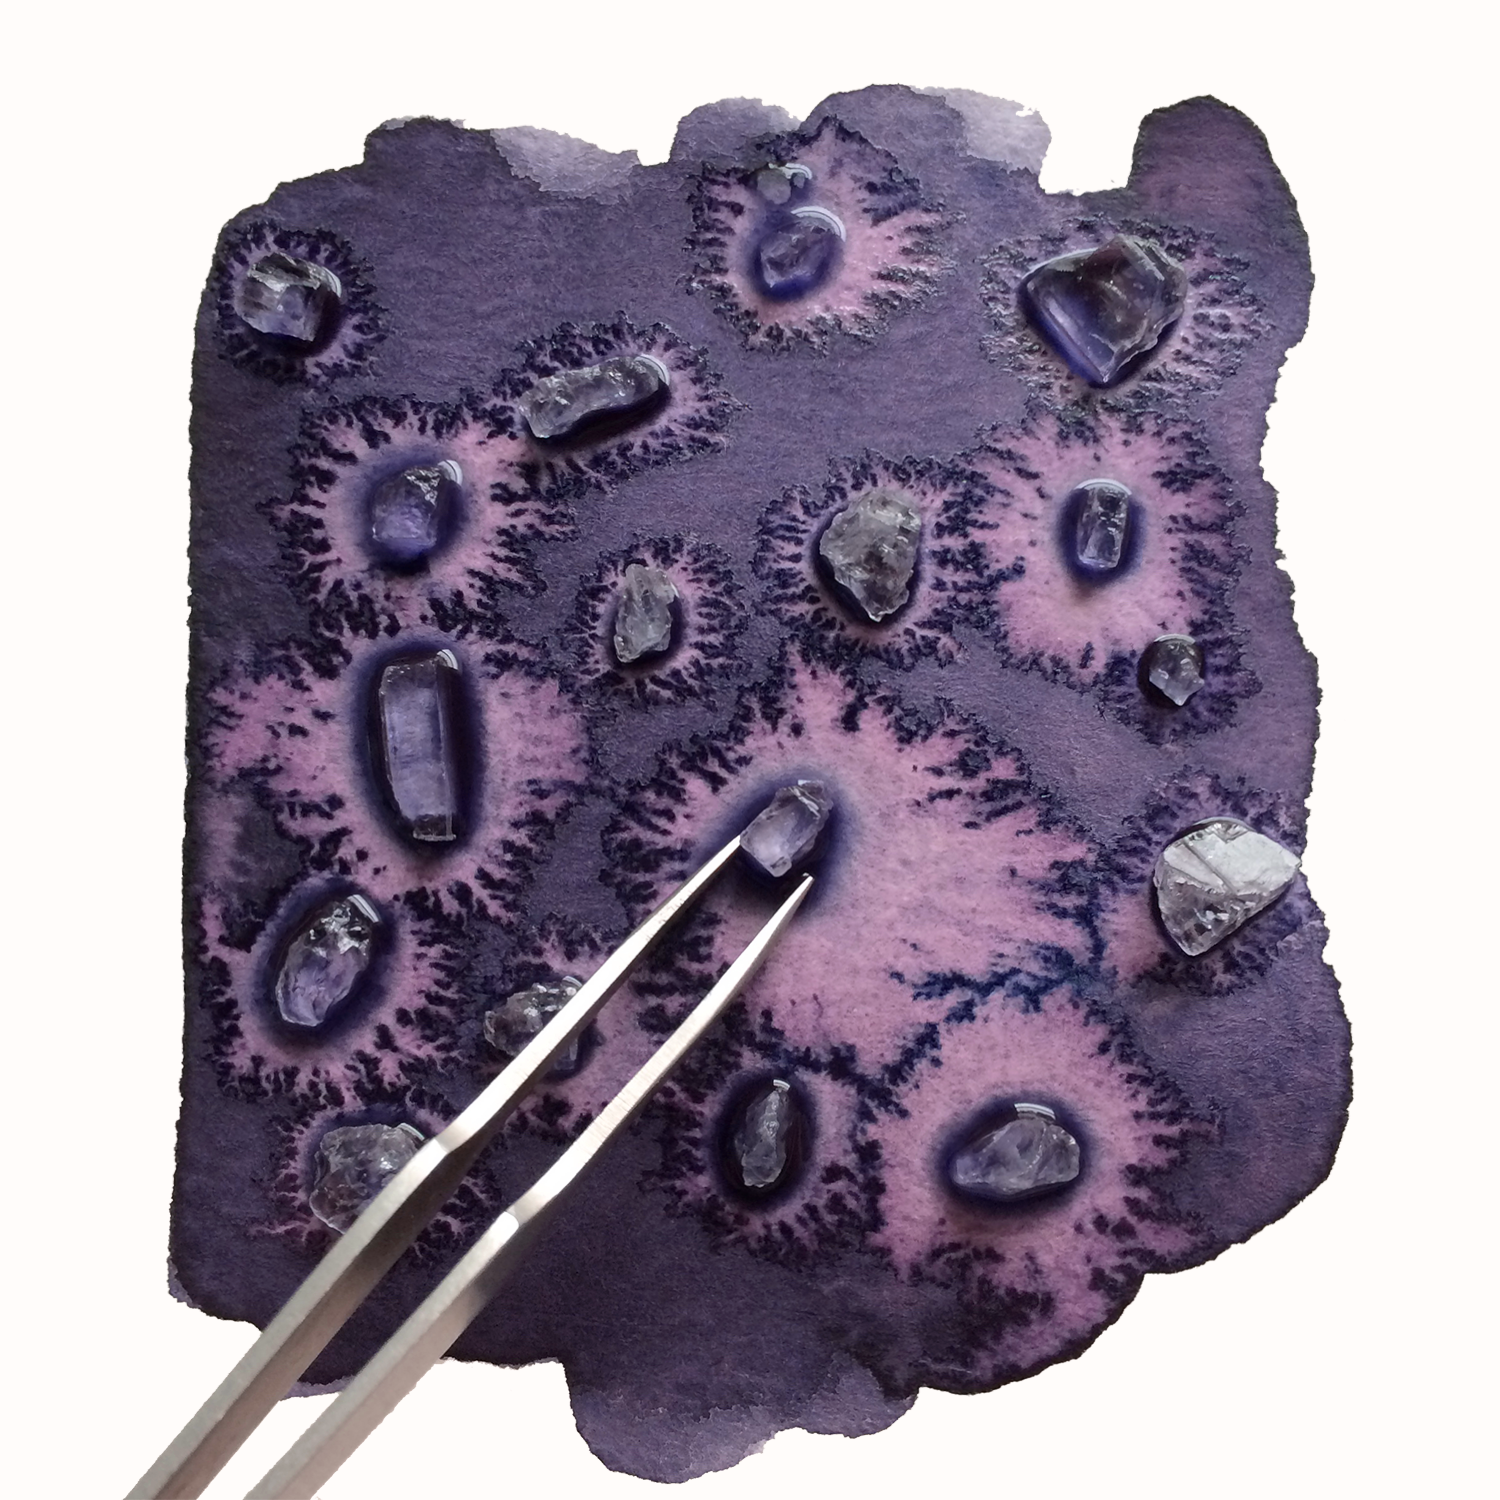
How to apply coarse ground salt to a wet wash?
Coarse ground salt is unique in its application to the paper. Using tweezers, dip the salt crystal into water before placing it in the wet watercolor wash.
How should salt be stored?
Salt is typically kept/sold in a salt shaker or in a salt box. The key is keep salt in an airtight container.
Store salt jars in a cool, dark, and dry place. Keep out of direct sunlight since heat will cause condensation and make your salt clumpy.

How to make your own sea salt:
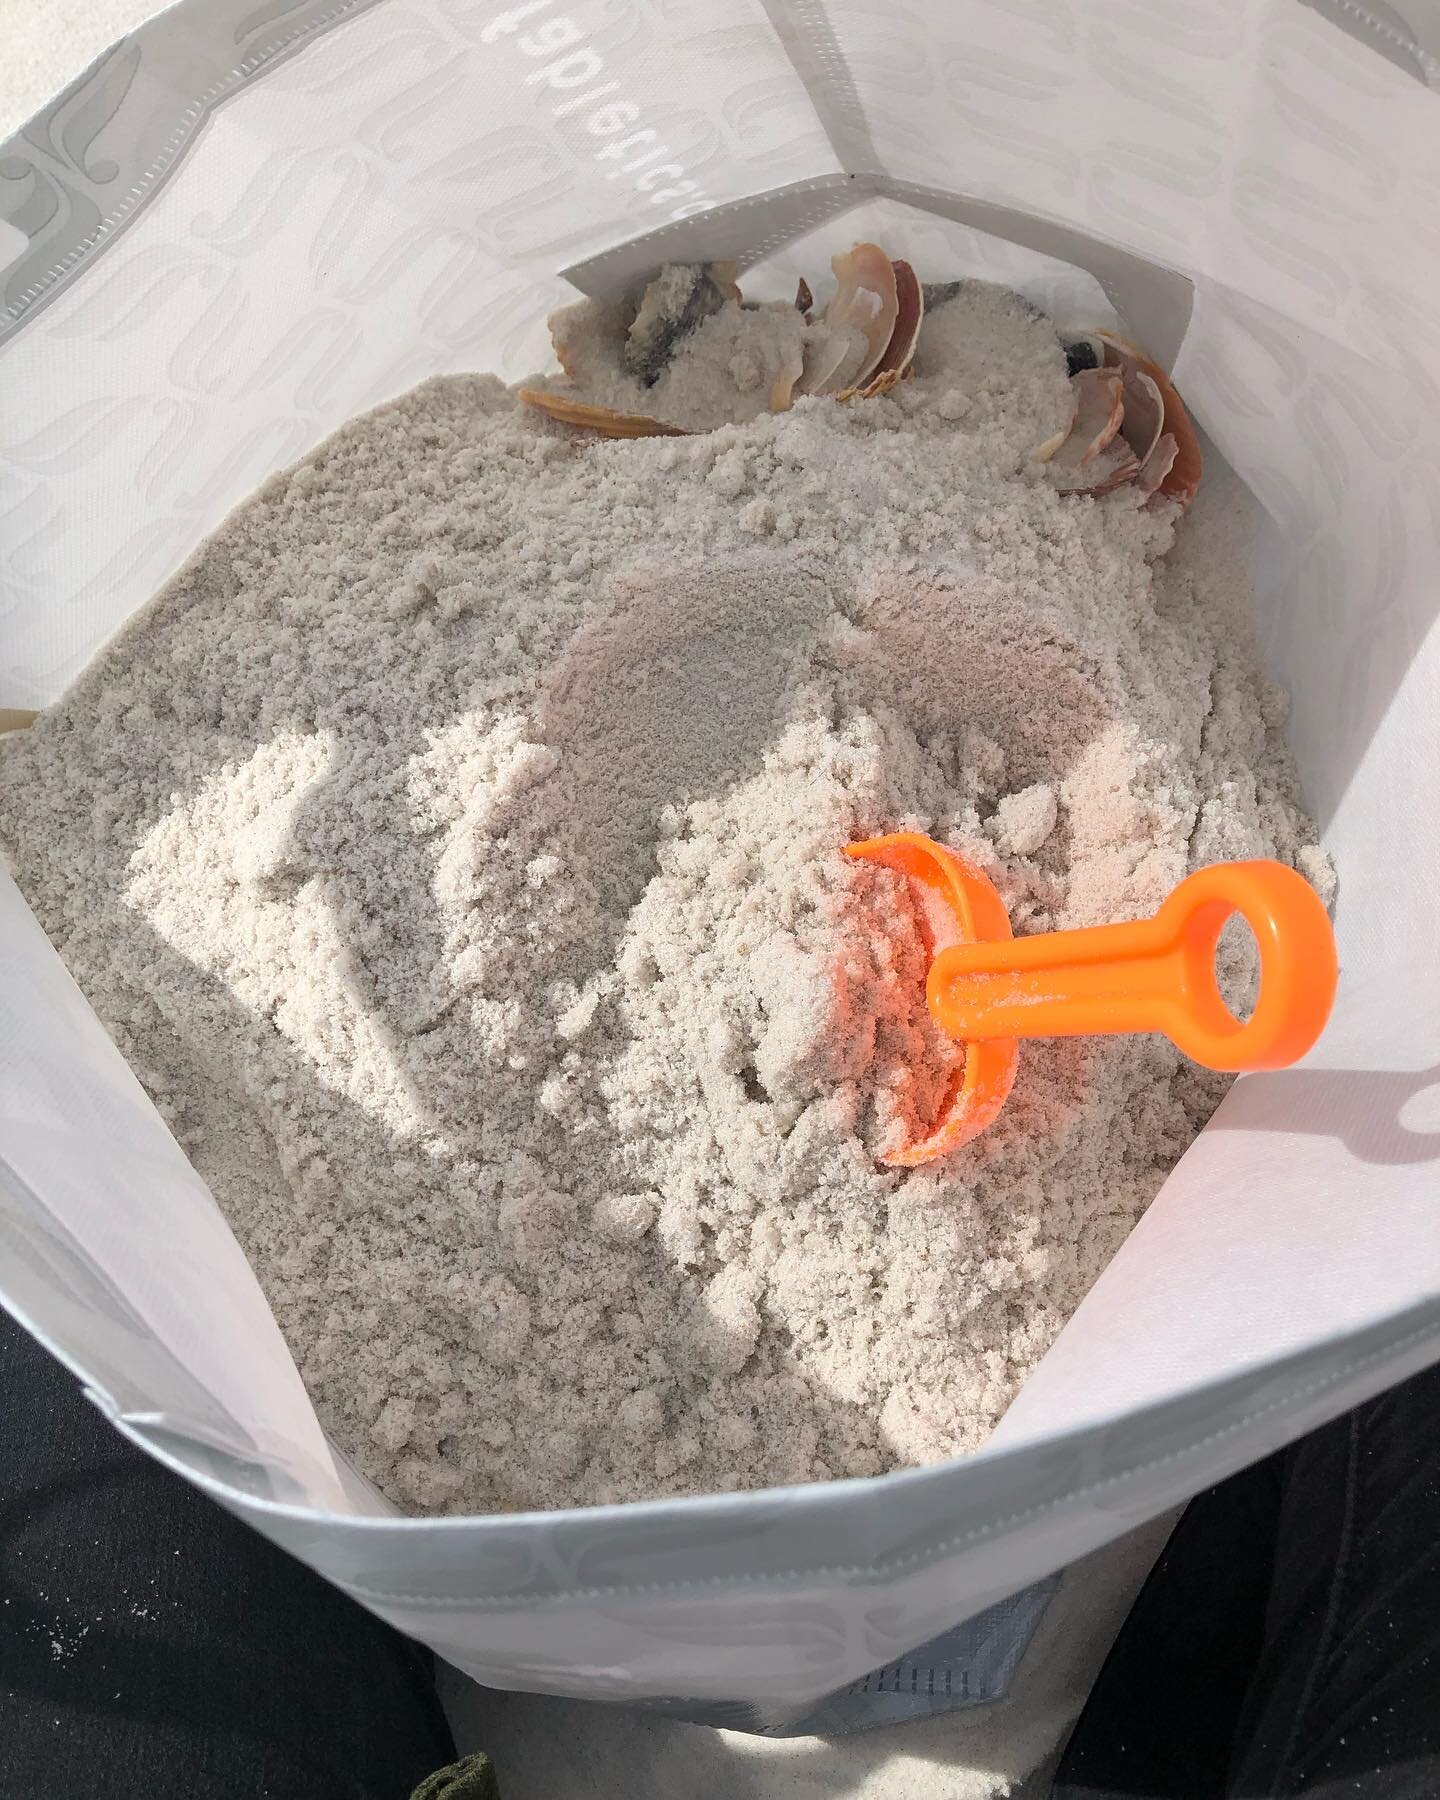
Making salt is really simple and a fun experiment to try. Below are images and steps of how I created salt using sea water from Pensacola Beach, FL.
Step 1: collect salt water from the sea.
Step 2: filter the water through cheese cloth to remove shell bits, sand, seaweed etc.
Step 3: pour the clean salt water into a baking pan. (Be careful not to use a metal that rusts.)
Step 4: allow the water to evaporate entirely.
Step 5: scape out your salt and store it in an airtight, glass container.